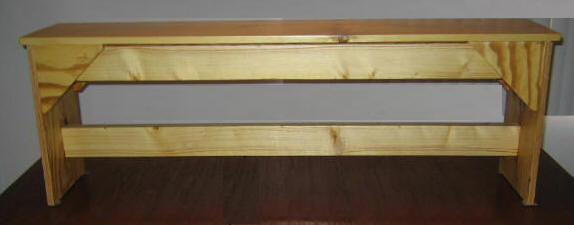
Building a wood bench is a project that can be fun and practical. This simple,
but sturdy bench can comfortably seat three adults and will provide years of service. You can build it practically for free
with the materials laying around a building site or your workshop; I used some 2x4's left over from a building project plus some
1x12 boards that I purchased. The required 6-foot pieces will fit in the back of a small hatchback car!

Material List:
(3) 6-foot 2 x 4's for the
bench frame.
(1) 6-foot 1 x 6's for the four bench leg braces.
(1) 6-foot 1 x 12 for the Bench
Top.
(1) 3/4" plywood and matching
edging material, or hardwood
(not pine as it will shrink and twist) 4' x 4' for the Bench
Sides.
(1) 1/4" plywood 2' x 8' for
the bench top nailers.
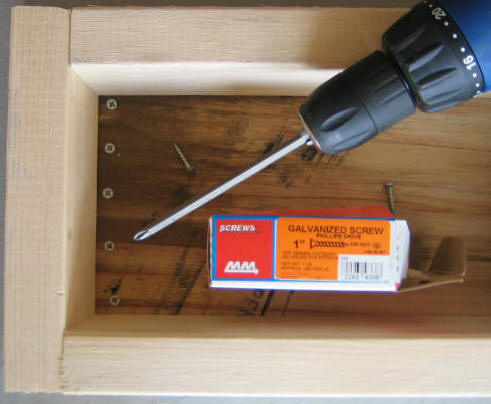
Eight framing spikes to build the bench support box. 2" nails to nail the bench 1/4"
plywood lids.
1", 2" and, 3" screws -
about a 1/2 pound of each.
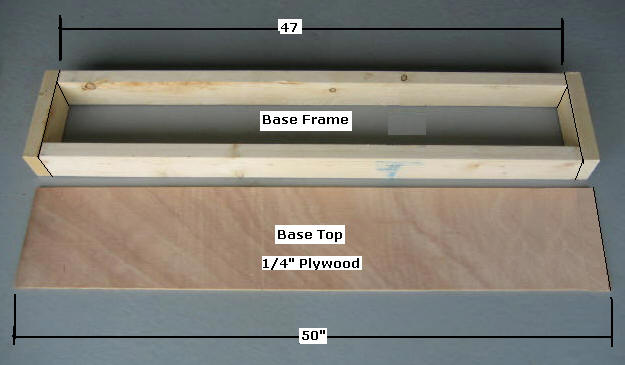
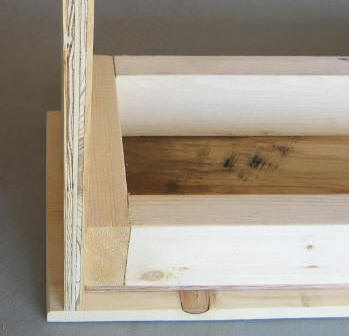
Step 1, Cut and Assemble the
Bench Base Frame - Select the 2 x 4; cut two pieces @ 47" and two @
9 1/4"; assemble them with the framing spikes as shown
above.

Select the 1/4" plywood; cut a
rectangle @ 9 1/4" x 50"; nail it to the frame with 2" nails
as shown above.
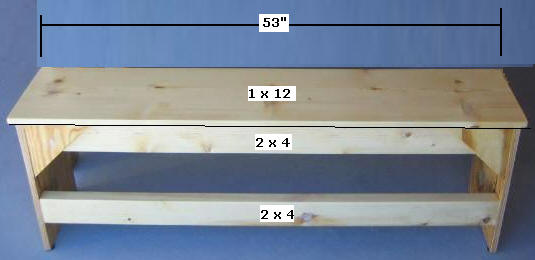
Select 1 x 12; cut 1 piece @ 53" for
the bench top board; attach it with 1" screws through the
bottom 1/4" plywood nailer; allow a 3/4" inch overhang on the front
and back edges; allow 1 1/2" on each end as shown below.
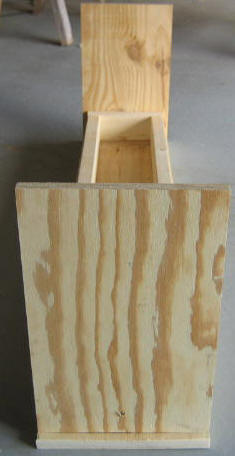
Step 2, Cut and Assemble the End
Panels - Select 3/4" plywood; cut two
rectangles @ 11" x 17 1/4" for the bench end panels; attach
each end with one 2" screw into the 2x4 brace as shown
above.
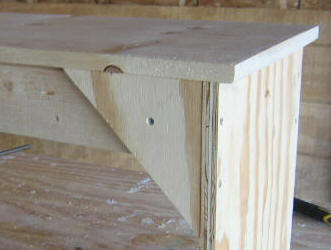
Select 3/4" plywood or 1 x 12
pine; cut four right
triangles @ 8" sides for the bench end panel braces; attach
each brace with four 2" screws as shown above.
Select 2 x 4; cut it to 50"; measure
four inches up from the floor and attach this rail on center between
the two end panels with four 3" screws as shown above.
Repeat the Bench building process
until you have built all the benches required.
Use a filler
to fill all the screw holes, sand Benches, prime,
and paint/stain to suit; attach some felt pads to the bottom
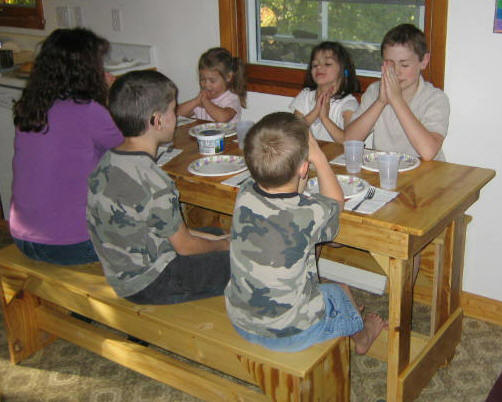
of the Bench Side Panels to protect any floors; now you are ready to sit and eat
comfortably on your new Benches.
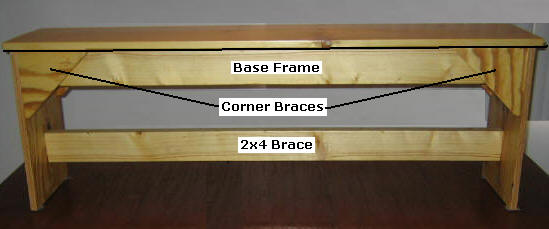
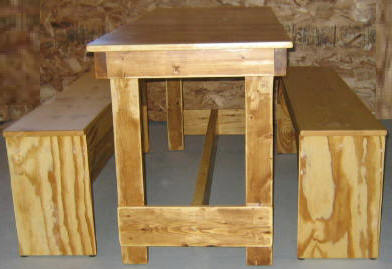
Here are the finished benches built with plans featured here!
Click Here
for the Free Trestle Table Plans!
|