| Build the birdfeeder shown on the right with just a few tools using scraps laying around
your shop! |
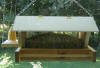
Click on image for larger view
|
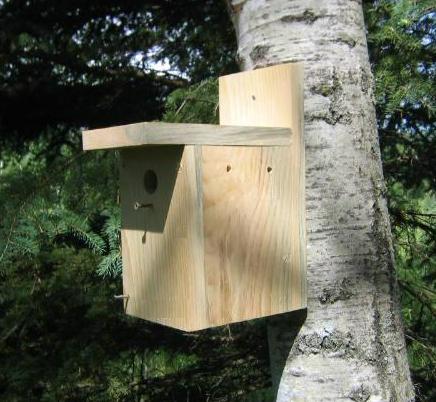
Build This Birdhouse! Free Plans
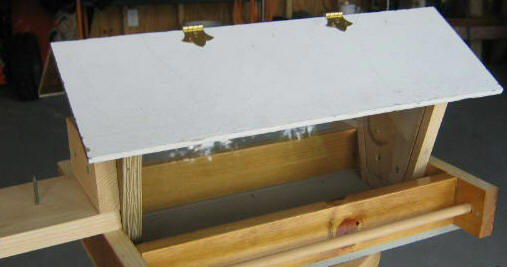
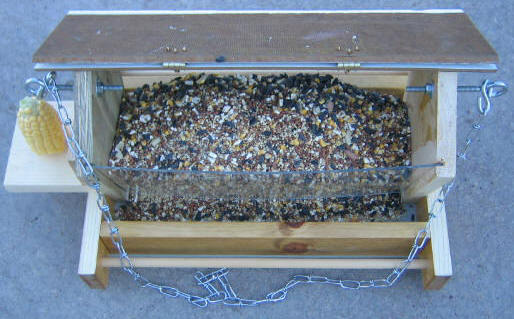
Building a bird feeder like the one above is a project that can be fun and practical. This
simple, but sturdy bird feeder has clear, plastic sides to view feed levels and holds about six pounds of feed. It allows
for gravity feeding, and the hinged roof allows for easy filling, and this feeder has plenty of room for hungry birds. You
can build this bird feeder practically for free with the materials laying around a building site or your workshop; I used some
3/4" exterior plywood and siding left over from a building project plus a 7/16" dowel rod. I did purchase the
1/8" plastic sheeting and eye bolts!
Material List:
3/4 inch thick wood or plywood to build the following:
- (2 pieces) 3/4" x 2 1/4" x 14 1/2"
- (2 pieces) 3/4" x 2 1/4" x 12"
- (2 pieces) 3/4" x 6 3/4" x 8 5/8" for the base structure.
Use pine if you wish to paint and/or seal and finish to protect against weather or use cedar or treated
wood.
(1) Piece of 1/4" exterior siding x
8 1/2" x 16" for the bottom panel; or cedar/treated wood.
(2) Pieces of 1/4" exterior siding x
5 3/4" x 17 1/2" for the roof; or cedar/treated wood.
(2) Pieces of 7/16" dowel rod @ 16"
for the bird's standing rod.
(1) Piece of clear plastic; 18" x
12"
One pair of hinges, three "S" hooks,
two eye bolts with four washers and nuts, and a length of
chain @ 36".
(48) 1 5/8" and 1" deck
screws.
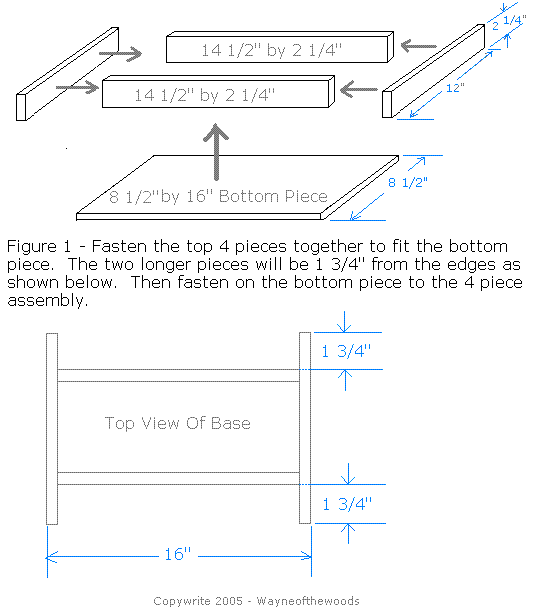
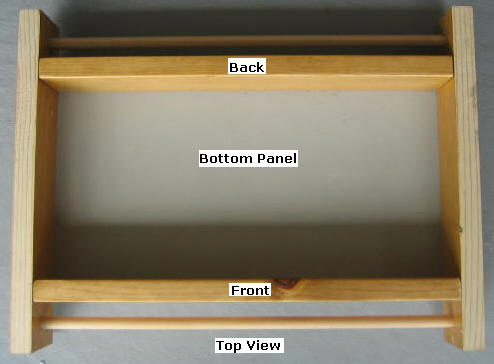
Step 1, Cut and Assemble the Base Pieces -
Select 3/4" Stock; rip it to 2 1/4":
- Cut two pieces @
14 1/2" for the front/back base
- Cut two pieces @ 12" for the
left/right base
- Select Piece of 1/4" exterior siding
and cut it to 8 1/2" x 16" for the bottom panel
as shown below
Select the 7/16" dowel rod and cut
two pieces to 16" for the bird's standing rod.
On the four edges measure in 1 3/4" and mark a line; mark the
crossing/center point lines and drill a 7/16" hole in
the center of each of the
four edges; insert and glue (exterior glue) the two rods as
shown below.
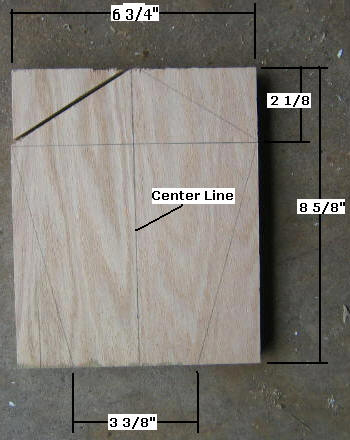
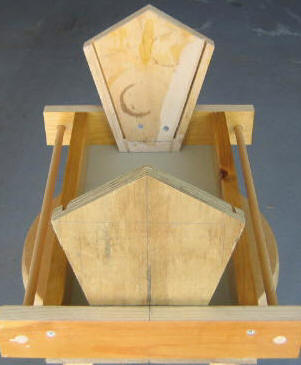
Step 3, Produce Two End Panels-
Select 3/4" Stock; rip it to 6 3/4". Cut two pieces @
8 5/8" as shown below. Mark the center line and mark
the bottom measurement of 3 3/8" (1 11/16" each side of
center).
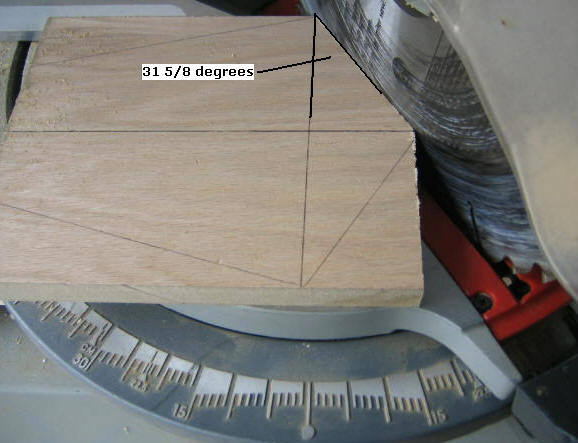
Select the two end pieces that have
been marked; set the chop saw to the "Crown Molding" setting
of 31 5/8 degrees and make the top cuts of both pieces as
shown above.
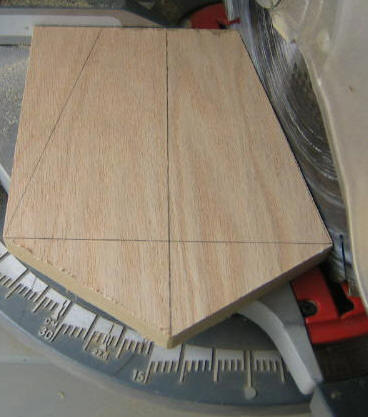
Select the two end
pieces that have been marked; set the chop saw to 15 degrees
and make the side cuts of both pieces as shown above.
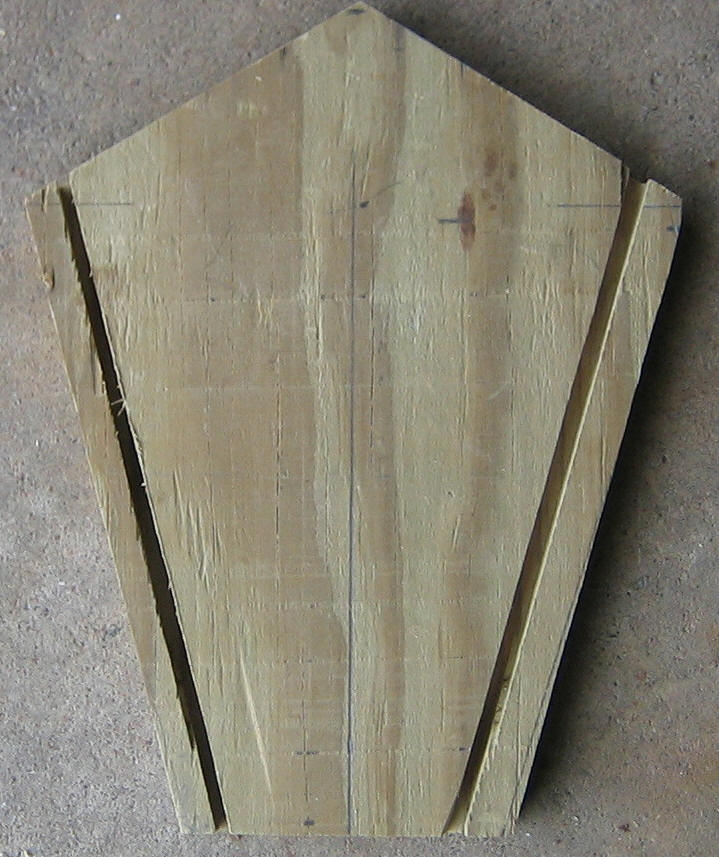
Select the two end
pieces that have been cut to size; set the table saw to cut
half the depth, 3/8"; set the saw protractor angle to match
the side; measure in 1/2 inch and make the groove cuts of
both pieces as shown above.
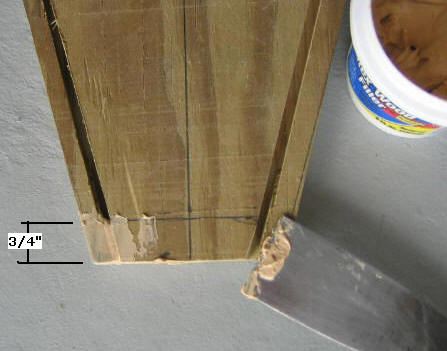
Select the two end
pieces that have the grooves cut; measure up from the bottom
3/4" and mark a line; fill the four grooves to the line with
some exterior wood filler as shown above or fill them with a
sliver of wood and glue.
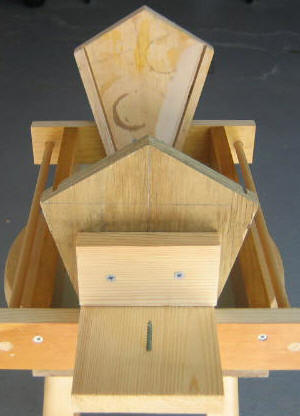
Step 4, Attach the End Pieces to
the Base- Select the base and the two end pieces; mark
the center of both pieces and attach them with two 1 5/8"
screws.
At this time, using a 1/8" drill
bit, drill about six drain holes in the bottom of the
feeder.
Step 5, Build and Attach the
Perch to the Base- Select 3/4" Stock; rip it to 4 1/2".
Cut one piece to 4 1/2" and a second piece to 2 1/2" as shown
below.
Select the 4 1/2" square and drive a 2" deckscrew
through the middle; this will hold an ear of corn.
Center and attach the square to the base edge with two screws.
Select the 2 1/2" brace piece and attach it with two 1"
screws as shown below.
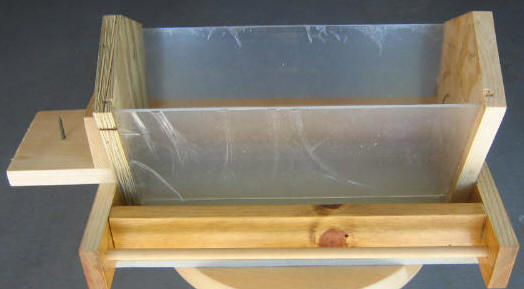
Step 6, Cut and Insert the
Plastic Sheets- Select 1/8" plastic stock; rip it to 6".
Cut two pieces to 14" (check your measurements); slide the
plastic into the grooves/position as shown below.
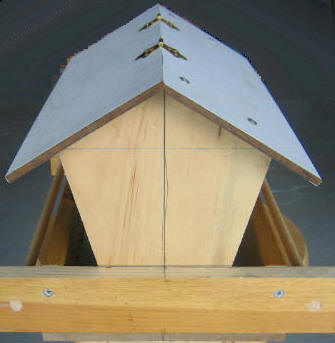
Step 7, Cut and Attach the Roof-
Select the exterior siding stock; rip it to 5 1/2".
Cut two pieces to 17 1/2". Select one roof side;
center it along the top edge and sides; attach this top half
with 1" screws as shown below.

Select the other roof half and two
hinges; position and attach the hinges as shown below.
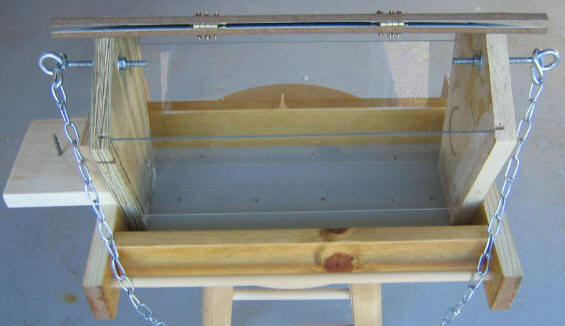
Step 8, Attach the Eye Bolts and
Chain- Select two 3" threaded eye bolts, washers, nuts;
on the two side panels, measure 1" down from the peak and
centered, and drill a 1/4" hole in each side. Attach the
eye bolts so they extend beyond the roof line, and connect
the chain with the "S" hooks as as shown below.
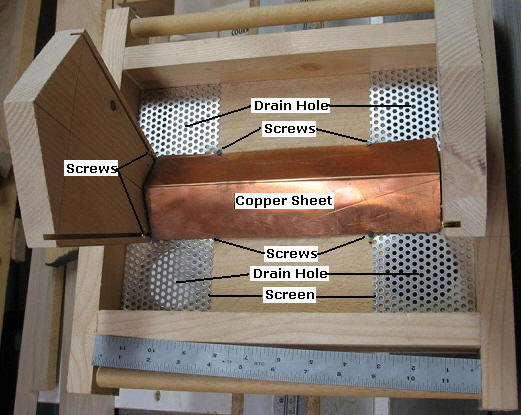
Step 9, Options - The above
image and added customization ideas were provided by a
fellow bird lover, "Wayne from Nova Scotia!"
1. Use four 1/2" screws as stops in the
four groove slots for the plastic panels.
2. Drill four drain holes @ 1 1/2",
one in each corner of the feeder tray, as shown above.
3. Obtain aluminum screening; cut
two pieces @ 3"x7"; lay one on each side of the feeder, as
shown above.
4. Obtain a 4"x10 1/2" piece of
copper sheeting; crease it and hold it in place with four,
1/2" screws, as shown above so the bird seed will stay fresh
and fall away to the edges.

Use an exterior filler
to fill all the screw holes, sand your feeder, prime,
and paint or clear coat to suit. Now, you are ready to fill it,
stick an ear of corn on the perch, and watch the birds out
your window as they feed.
|