|
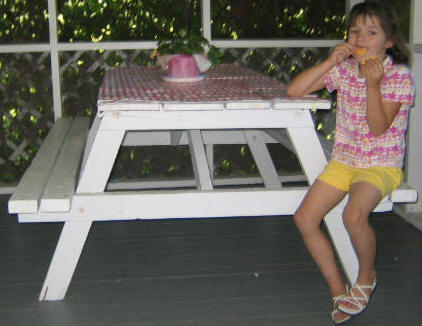
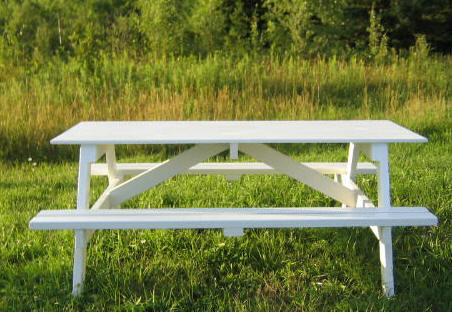
This picnic table is about 30
years old and belongs to my daughter - it is similar to the
picnic table built with the plans given here.

Building a picnic table is a
project that can be fun and practical. This
simple, but sturdy picnic table can comfortably seat six
grownups; will provide years of service. You can build this
table
practically for free with the materials laying around a
building site or your workshop;
I used some 2x4's left over from a building project plus
some 1x8 boards. The required 6-foot pieces will fit
in the back of a small hatchback car!
Material List:
(10) 6-foot 2 x 4's for frame and seats.
Use pine if you wish to paint and/or seal and finish to
protect against weather or use cedar or treated wood.
(4) 6-foot 1 x 8's for the table top,
pine or cedar/treated.
Stainless Steel or Galvanized, 5/16" x 3 1/2" carriage bolts,
washers, nuts; Eight sets
1 1/2" and 2 1/2"" deck screws
- about a 1/2 pound of each type.
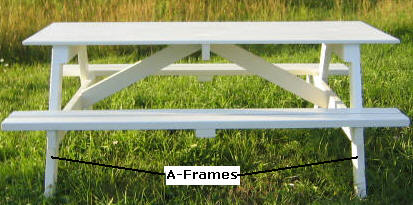
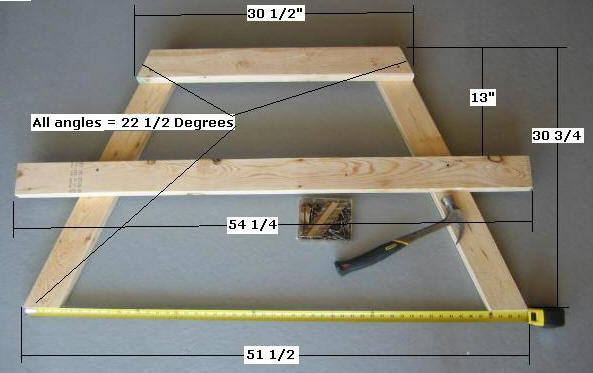
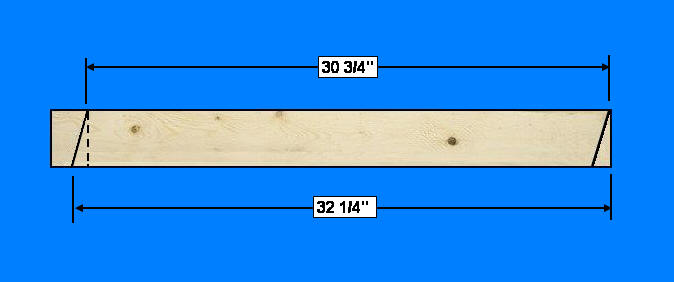
Step 1, Cut the Left/Right
A-Frame Pieces -
Select 2 x 4; cut the four vertical legs @ 30 3/4"" with
the proper
angle of 22.5 degrees at each end as shown above.
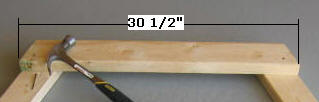
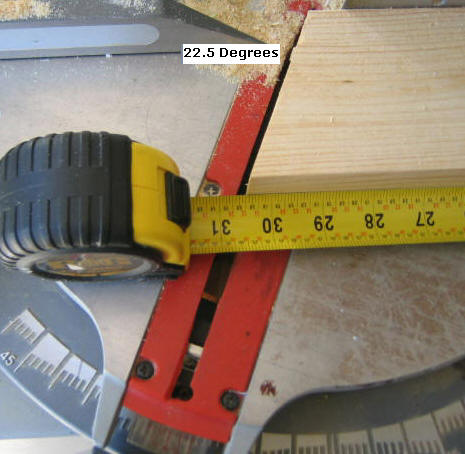
Cut the top cross brace, two @
30 1/2" long
with the proper angle set at 22.5 degrees on your chop saw.
Cut the lower cross brace, two @ 54
1/4"
long with no angle.
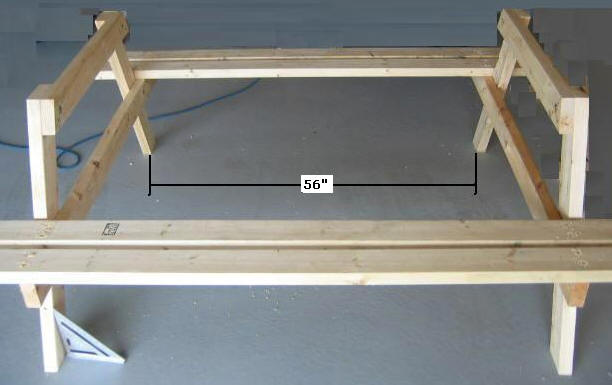
Step 2, Assemble the Left/Right
A-Frames -
Select the vertical legs and lay them in the proper position
per the picture above on a flat surface; Select
the top and lower cross braces and lay them in place per the picture above; dry fit all
four
pieces; line up the top angles; ensure the lower brace is
equal distance from each leg; ensure the lower legs are
spread to 51 1/2". Use a clamp where each brace
intersects with each leg. Tack the pieces in place
with one 2 1/2" nail (or use a screw) at each of the four crossing points;
Do not center the
nail at the crossing points since your bolt will go there.
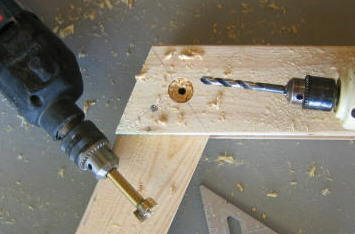
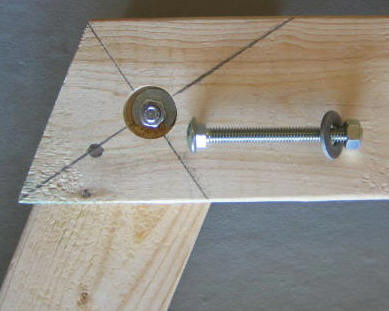
Option: Drill four, 1" holes
@ 1/2" deep with a Forstner bit and/or a 5/16" hole
so the bolt head lies below the surface. Place one hole
in the center of each of the four intersecting points; use the
5/16" x 3 1/2" carriage bolts (If you used a Forstner bit,
use a 3" bolt), washers, nuts to secure these four
connecting points. Repeat
this step to complete the assembly of the second A-Frame.
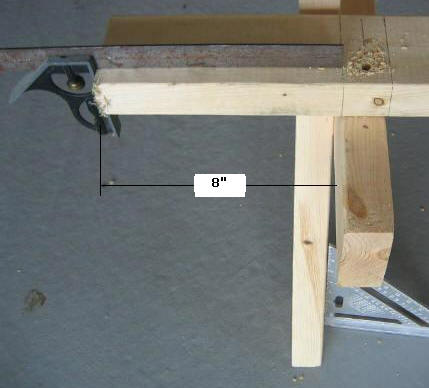
Step 3, Connect the Bench Pieces-
Select one of the A-Frames; using the 2 1/2" deck screws,
attach two of the 2 x 4 x 6' on each side of the protruding,
lower
support brace; counter-sink all screw holes; the bench 2x4's should extend
8" beyond the
support brace. Select the other A-Frame and connect
the bench boards to it with the same 8" overhang as
shown above.

Step 4, Attach Table Top Boards
- Select the four, 1 x 8 x 6'; using the 1 1/2" deck screws,
attach the boards to the top braces of the A-Frames;
counter-sink all screw holes; allow an even 8" overhang at
each end. Mark the center point on each of the top braces;
put the first top board up to these center points and attach
it; use a screw for spacing the remaining boards.

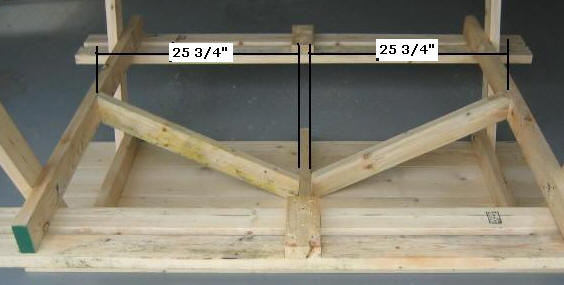
Step 5, Attach Center, Bottom Support
Bracing- Select 2 x 4 x 6; cut one piece @ 29" for the
bottom support brace; cut a 22.5 degree angle at each end per
the picture below; center the support and clamp it in place; using the
2 1/2" screws, attach the
table top boards to the center brace.
Flip the table over.
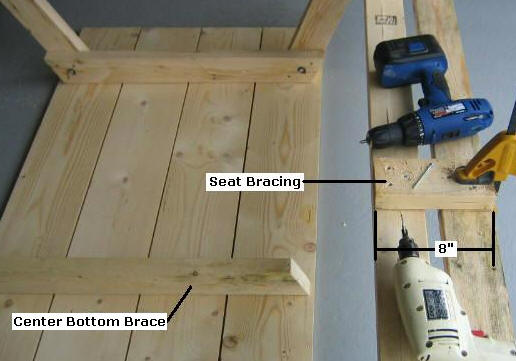
Select 2 x 4; Cut two Seat bracing pieces
to 8"; connect them to the center, bottom of the seats per the picture above
with 2 1/2" screws.
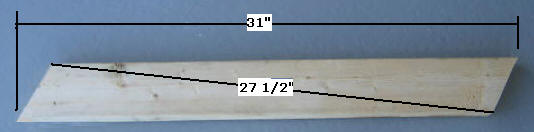
Select 2 x 4; Cut two bottom, angled bracing pieces
to 31" per the picture above. Set the chop saw to
28 degrees; Cut the two,
28 degree angles, as shown above. The distance between
the two short corners is 27 1/2".
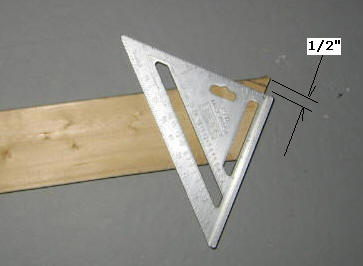
With the 28 degree angles cut,
remove 1/2" of material from each end tip. Using a
speed square as shown above, measure down 1/2" from the tip
and mark a 90 degree line; cut the notch at each end of both
braces.
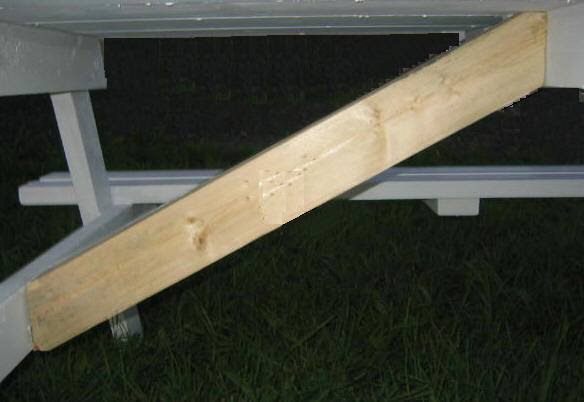
Connect the angled braces
to the center, bottom brace and to the A-Frame lower cross
piece with the 2 1/2" screws.
Here is the finished picnic table
built with plans featured here!
Use an exterior filler
to fill all the screw holes, sand your table, prime,
and paint to suit; and you are ready to sit and eat
comfortably on your new picnic table.
|