|
Material List:
5/8" OSB, 4' x 8': Five pieces
2 x 4 x 8': Five treated pieces
1 x 6 x 8' Treated Boards: Two pieces
10' x 10' Tarp w/grommets: One
1.5" Galvanized Screws: Quarter Pound
Exterior Paint

Tool List:
Measuring Tape
Pencil
Saber, Radial, and/or Hand Saw
Screw Gun
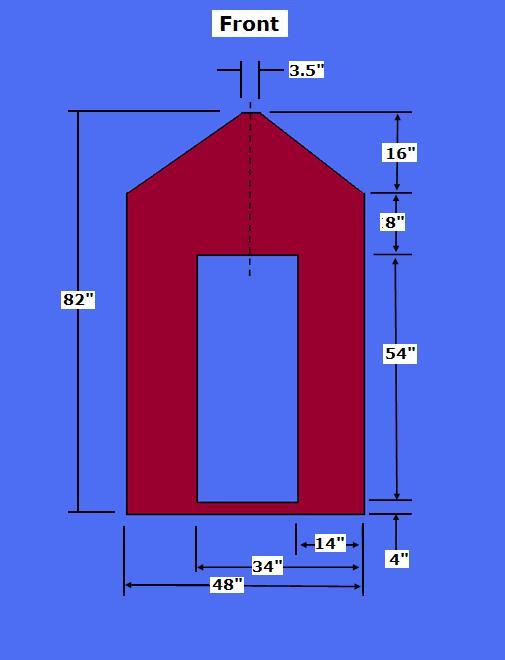
Step 1, Cut the Playhouse Pieces - Select the OSB Panels.
Select one OSB Panel: Using the dimensions above, measure and mark the panel for the Door and the
Roof Peak. Using a saw, cut out the Door and Roof Peak (If you cut the door panel with accuracy, you could use it for an
optional door).
Select a 2nd OSB Panel: Using the Front Panel as a template, mark the Back Wall Panel for the Roof
Peak and mark a window, if desired. Using a saw, cut out the Roof Peak and Window.
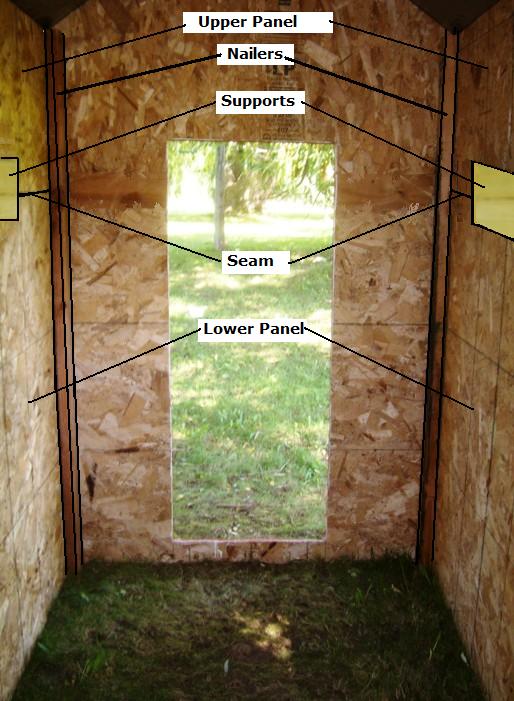
Select a 3rd, 4' x 8' OSB Panel: Rip two pieces @ 18" for the Upper Panels of each side.
Select the four, 2 x 4 x 8' Boards: Crosscut them @ 66" for the four, Corner Edge Nailers.
Select the two, 1 x 6 x 8' Treated Boards: Cut the two Boards @ 7' for the Connector Support Braces.

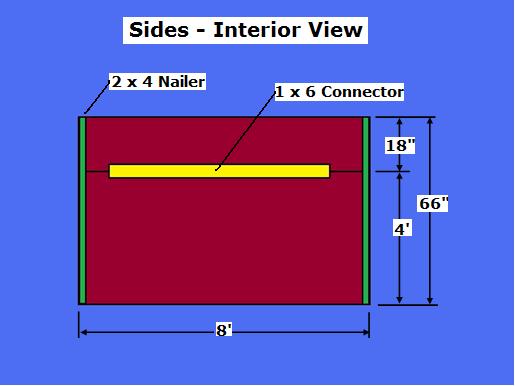
Step 2, Prepare the Pieces - Select the Top (18" high x 8' long) and the Bottom (48"
high x 8' long) Side Panel Assembly pieces, 2 x 4 x 66" Corner Edge Nailers, plus the two, Connector Support Braces.
Select the building site and two OSB pieces that make one Side Assembly Panel; Lay the two pieces on the
flat ground with the exterior facing up (Option: Purchase another OSB board or tarp for use as a floor).
Select two, 2 x 4 x 66" Corner Edge Nailers; Place them underneath each Left and Right edge of the
Side Panel Assemblies, align the Nailers flush to the side, top, and bottom edges of the Side Panel Assemblies; using the galvanized
screws, attach the Pieces to the Nailers. Repeat this process for the other Side Panel Assembly.
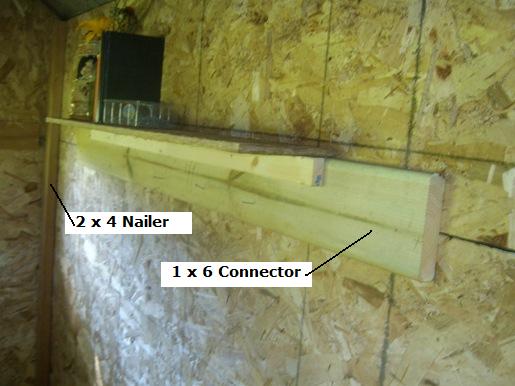
Select 1 x 6 Connector Support Braces; Flip the Side Assembly over to show the interior facing up; Center
the Brace along the seam of the upper and lower Side Pieces; Using ONLY two screws, tack the Brace in place; Flip the Side Assembly
over again. Using multiple screws, attach the Upper and Lower Side Pieces to the Connector Support Brace. Repeat this process
for the other Side Assembly.
Mark and cut out Windows as desired.
Step 3, Assemble the Play House- Select all four pieces, Front, Back, and two, Side Assembly Panels.
With the help of another person, raise one Side Assembly upright to the desired position/location; raise
the Front Panel to meet it; align the edges so the Front and Side Assembly Panel are straight and plum; using multiple screws,
attach the Front Panel to the Corner Edge Nailer.
Raise the 2nd Side Panel Assembly into position and screw the Front Panel to the other Corner Edge Nailer
on this 2nd Side Panel Assembly.
Raise the Back Panel and screw it into Corner Edge Nailers of both Side Assemblies.
Select the remaining 2 x 4 x 8' Board; Using two screws at each end, place and connect the 2 x 4 between
the peaks of the Front and Back Panels.
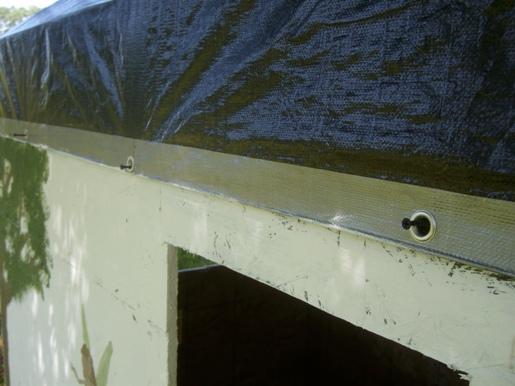
Select the 10' x 10' Tarp; Center it over the top of the Play House. Using the screws, secure the
Tarp to all surfaces Staples are an option here).
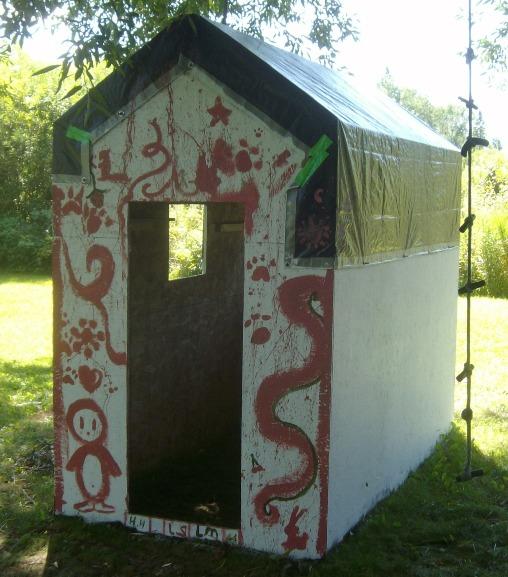
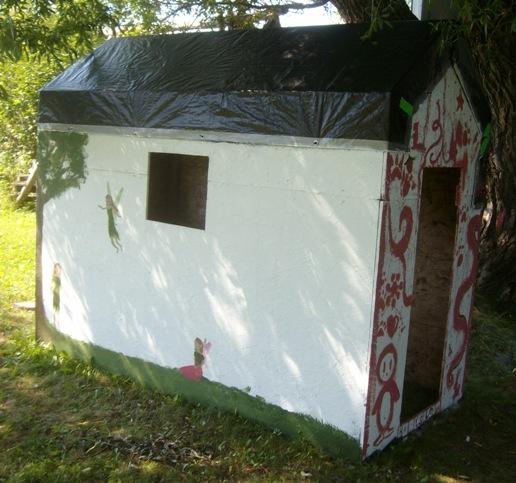
Step 4, Finish the Play House- Instruct the young users to use their creativity, grab a paint
brush, sit back, and watch them work.
More FREE Plans!
Picnic Table Plans
Gun Rack Plans
Bookcase Plans
Bird Feeder
Boot Rack
|