|
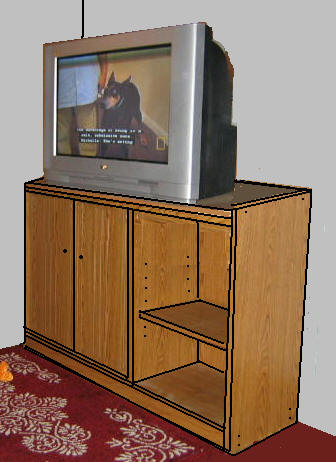
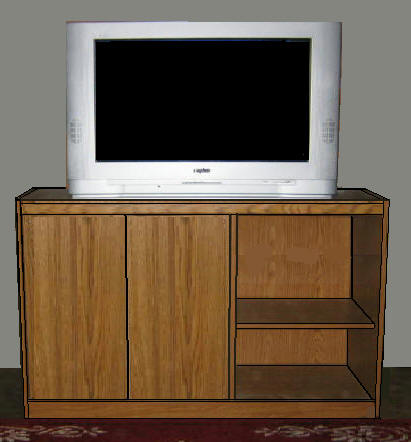
This TV Stand and Entertainment Center Plan is only one
design of many possibilities to place your Big Screen TV and
other AV equipment!
If you would like to replicate it, follow the simple
directions below.
Material List:
1 Sheet of Finished Plywood; 3/4" x
48" x 8'.
One piece of plywood, 1/8" x 48" x
48" for the Back Panel.
Two pieces of 2x4 @ 8' for the Base
Frame.
Eight Framing Spikes, half pound of 1
5/8", a half pound of 1 1/4"screws and wood glue.
Four hinges for the two doors.
Edging material for all finished
edges.
Eight shelf brackets for two
shelves.
Two door pulls; two
door pressure clips or magnetic clips to keep the cabinet doors
closed.

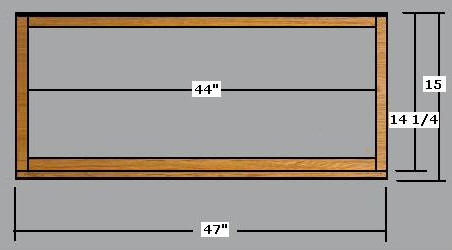
Step 1, Build Base Frame - Select
2x4 material; crosscut two pieces @ 44" and two pieces @ 14
1/4"; connect the four pieces with framing spikes as shown
above. Select 3/4" plywood; rip one piece to the width
of a 2x4 (3 1/2"); crosscut it to 47" and connect it to the
2x4 as the finished front base panel, as shown above with
glue and brads.
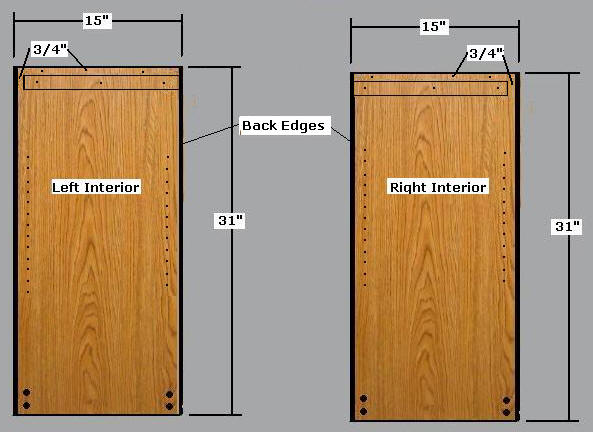
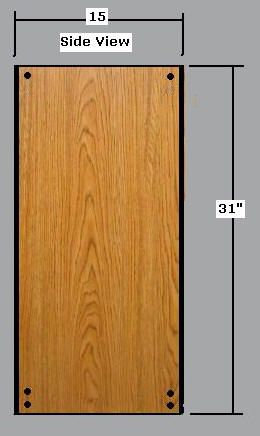
Step 2, Build the Side Panels -
Select 3/4" material; rip and crosscut two pieces @
15"x 31". Select 3/4" material; rip and
crosscut two pieces @ 1 1/2" x 14 1/4" for the top support
braces; attach them using 1 1/4" screws as shown above 3/4"
down from the top edge and flush with the back edge.
Select the shelf brackets of your choice, use/build a hole
template and drill the appropriate holes 2" in from front
and rear edges @ 3/8" deep.
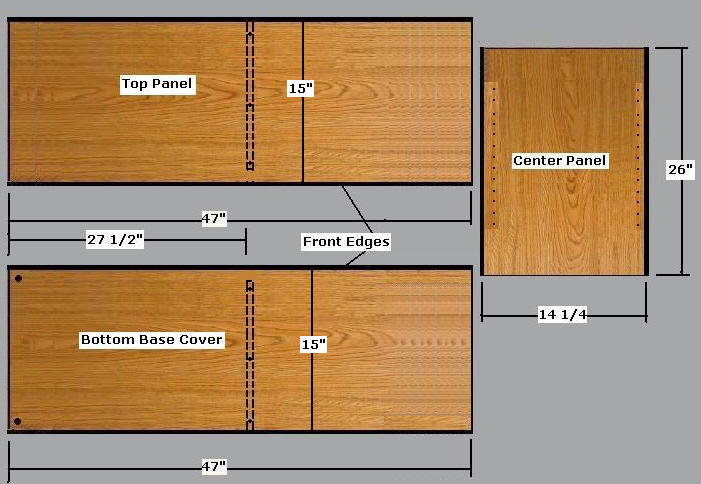
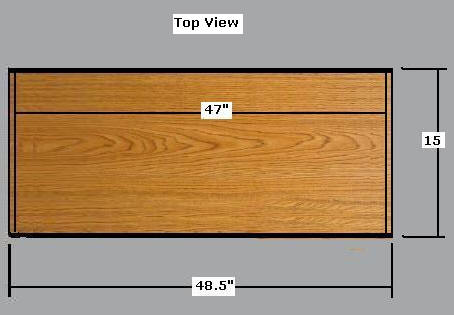
Step 3, Build the Bottom and Top Panels - Select the
3/4" material; rip and crosscut two pieces @ 15" x
47" for the top and bottom panels,
as shown above. Lay the Top onto the Bottom Panel with
all edges aligned and clamp them tight. Measure in 27
1/2" from the left edge; using the edge of a piece of 3/4"
material scribe two lines that will represent the placement
of the edges of the Center Panel; drill two, 1/8" holes, two
inches in from each edge and a third hole in the center
between the scribed lines (drill the holes completely
through both boards).
Step 4, Build the Center Panel - Select the
3/4" material; cut a piece @ 14 1/4" x 26" for the
Center
Panel, as shown above. Use the Shelf Hole Template to
drill the shelf bracket holes in the Center Panel (drill
completely through the Center Panel); align the holes to
match up with the side panels; allow for the 3 1/2" Base
Frame and 3/4" Bottom Base Cover.
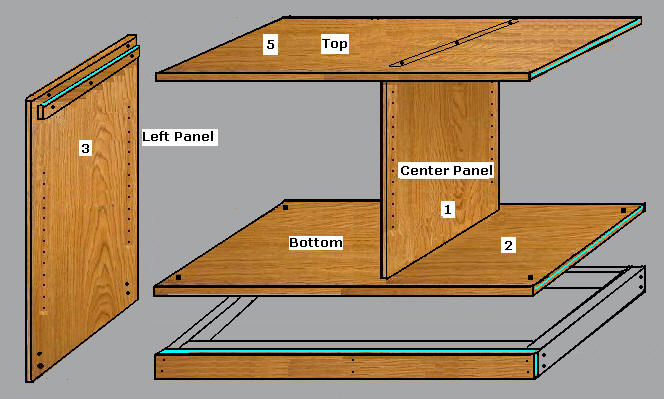
Step 5, Assemble the Cabinet-
#1. Attach the Center Panel to the Bottom Panel with 1 5/8"
Screws from the underside into the Center Panel edge, as
shown above. Align the back edge of the Center Panel
with the back edge of the Base Panel with a 3/4" reveal at
the front edges. #2. Screw the Bottom Base Panel to
the Base Frame, as shown above. #3. Screw the Left
Side Panel from the outside into the Base Frame. #4.
Screw the Right Side Panel from the outside into the Base
Frame. #5. Place the Top Panel in place on the Braces
and attach with screws through the pre-drilled holes into
the center panel edge. Then attach the Side Panels
from the Left and Right exterior sides into the Top Panel
edges. All edges should be flush and square and
countersink all screw holes. Attach the edging
material to the finished edges before you begin assembly.
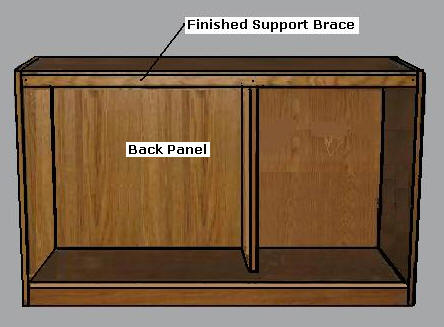
Step 6, Build Finished Support
Brace and Back Panel- Select the 3/4" material; cut
one piece @ 1 1/2" x 47"; attach the brace with
glue and brads as shown
above. Select the 1/8" material; cut it to 13 x 48
1/2; attach it to the back with brads every eight inches.
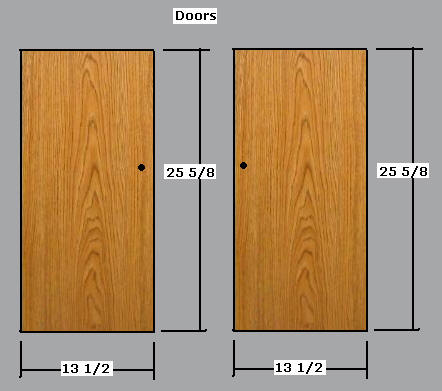
Step 7, Build Cabinet Doors - Select the 3/4" material; cut two
pieces @ 13 1/2" x 25 5/8" for the two doors;
attach edging material, attach hinges, connect the
doors to the side panels, and install the magnetic door
stops.
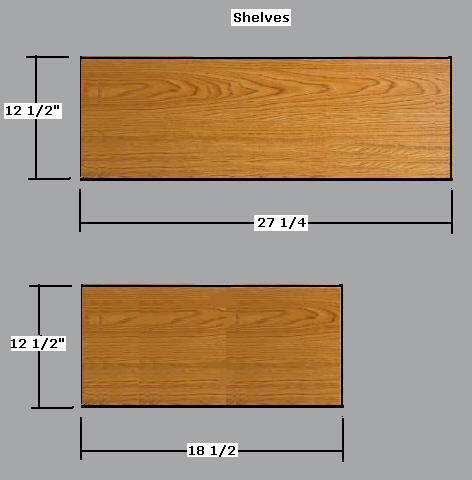
Step 8, Build Shelves -
Select the 3/4" material; cut two pieces for the two shelves
according to the dimensions above; attach edging material
and install them. At this time, cut any holes in the
Back Panel for cables.
Finish the Entertainment Center by
filling all screw holes, sand, stain, and polyurethane.

Your Entertainment Center is now complete; you can now
install
your A/V equipment; enjoy.
|