|
Free
Dollhouse Plan
Check Out The DollHouse Building Plans Below!
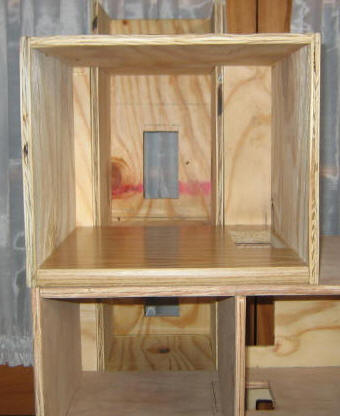
| Build the
dollhouse
shown on the right with just a few tools and a small
investment in materials! |

Click on image for larger view
|
Click here for Other Dollhouse
Kits and Accessories!
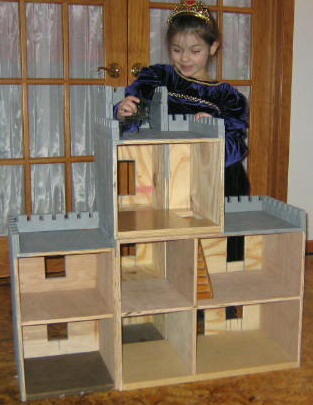
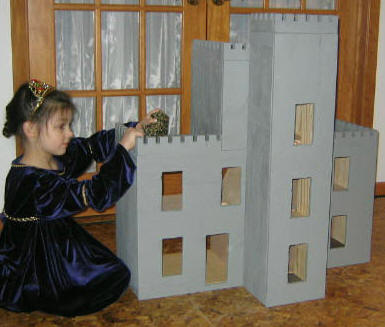
Here is a free dollhouse plan; building a dollhouse can be a rewarding project for the builder
as well as the one who decorates it; if you like this simple
castle-type design and
wish to replicate it; begin with the supply list:
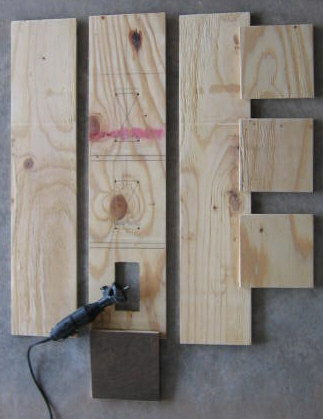
1 Piece: 3/4" plywood 4' x 4'; used for the bases of the house
components.
1 Piece: 1/2" plywood 4' x 8'; used for walls and
floors/ceilings.
1 Piece: 1/8" x 5/8" x 4' "L-shaped" corner molding used
for stairs.
1 Piece: 1/8" x 12" x 12" plywood used for the stair case
supports.
Glue, l" brads.
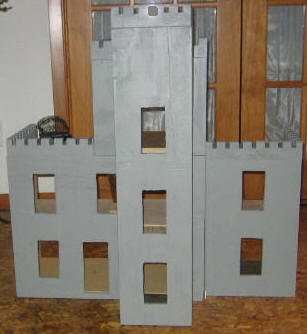
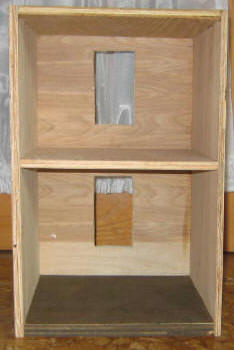
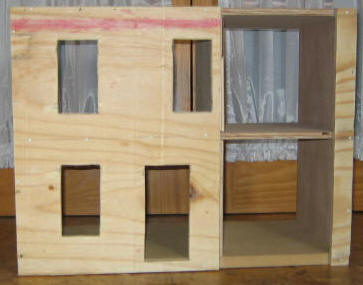
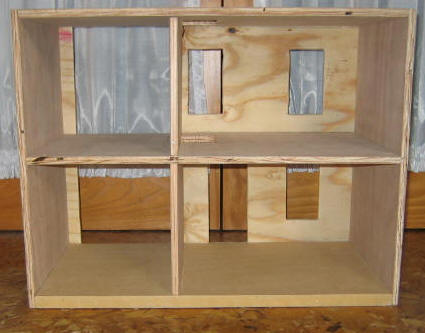
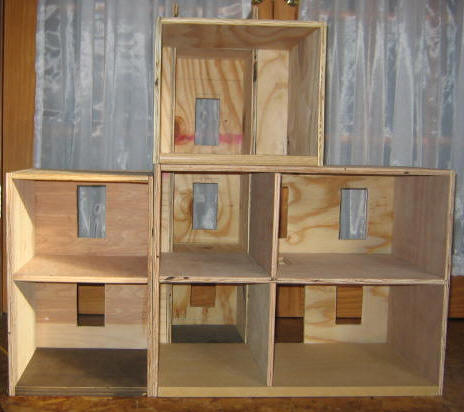
This plan has four components to it:

1. The Tower
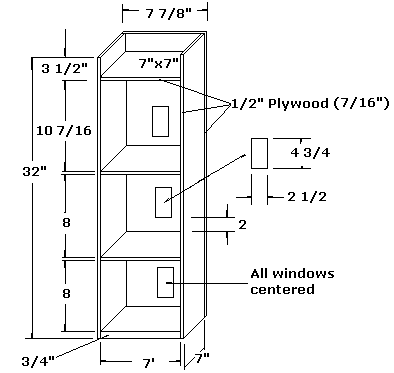
a. Cut the Tower pieces per the dimensions above; cut the side
walls; set your table saw fence at 7" and rip the two side walls;
cross cut the two sides to 32".
b. Cut the 3/4" plywood base to a 7" x 7" square; then cut the
three 1/2" plywood 7" x 7" squares for the three floor/ceiling
sections.
c. Cut the front panel; 1/2" plywood; rip it to 7 7/8"; cross cut to
32".
d. Layout the windows and floors/ceilings; with a roto cutter cut
out the window openings.
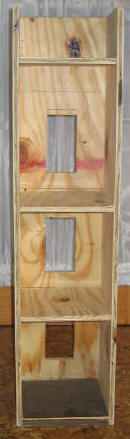
e. Assemble the two sides to the 3/4" base with glue and 1" brads.
f. Position the top floor/ceiling; glue and nail in place.
g. Position the other two floor/ceilings; glue and nail in place.
h. Position the front wall with windows cut out into place, glue and
nail.
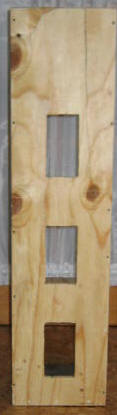
2. The Extension:
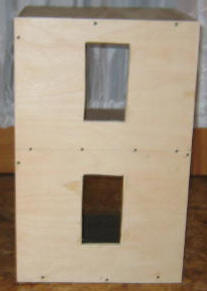
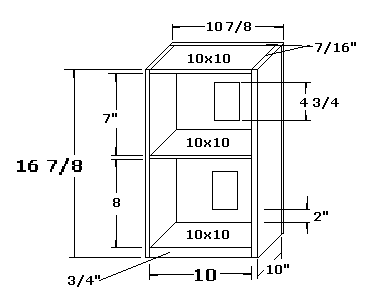

a. Cut the Extension pieces per the dimensions above:
b. Set your table saw fence at 10" and rip the 1/2" plywood for the
two side walls (cross cut to 16 7/8"); and the two
floor/ceiling sections (crosscut to 10").
c. Select the 3/4 plywood and cut a 10" x 10" square for the base.
d. Set your table saw fence at 10 7/8" and rip 1/2" plywood for the
front panel; cross cut to 16 7/8".
e. Layout the windows and floors/ceilings to the dimensions listed
above; with a roto cutter, cut out the window openings.
f. Assemble the two sides to the 3/4" base with glue and 1" brads.
g. Position the middle floor/ceiling; glue and nail in place.
h. Position the top floor/ceiling; glue and nail in place.
i. Position the front wall with windows cut out into place, glue and
nail.
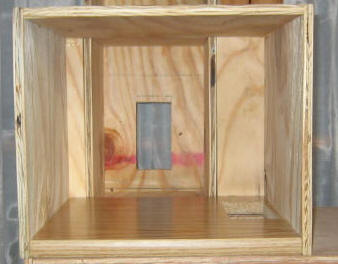
3. Main Building:
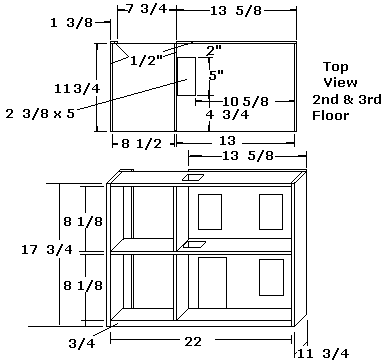
a. Cut the base (3/4" plywood) and two floor/ceiling pieces (1/2"
plywood) per the dimensions above (22 x 11 3/4).
b. Select the two floor/ceiling pieces (1/2" plywood); measure and
cut the holes for the stairways per the dimensions above (2 3/8 x
5").
c. Measure and cut the two side walls (11 3/4 x 17 3/4).
d. Measure and cut the two interior walls (8 1/8 x 11 3/4).
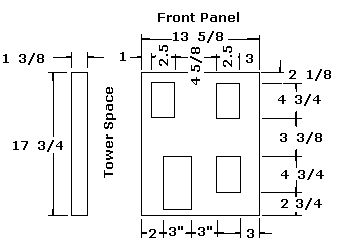
e. Measure and cut the two front panels; 17 3/4 x 1 3/8 and 17 3/4 x
13 5/8; cut the holes for the doors and windows per the diagram
above.
f. Assemble the two side panels to the 3/4" base.
g. Using the two interior walls (8 1/8") as guides install the
second floor panel (ensure the stairwell holes are positioned
correctly towards the front door).
h. Install the interior wall of the main floor using glue and 1"
brads per the diagram above;
8 1/2" from the left exterior wall; the right edge of the interior
wall should line up flush with the edge of the stairwell opening.
i. Install the 3rd floor/ceiling per the diagram above using glue
and 1" brads; all edges should be flush; ensure the stairwell hole
is toward the front, in line with the other hole below.
j. Install the 2nd floor interior wall in line with the first floor
wall; flush with the edge of the stairwell holes.
k. Install the front panels; glue and nail the 17 3/4 x 1 3/8
and the 17 3/4 x 13 5/8 panels per the diagram above; ensure
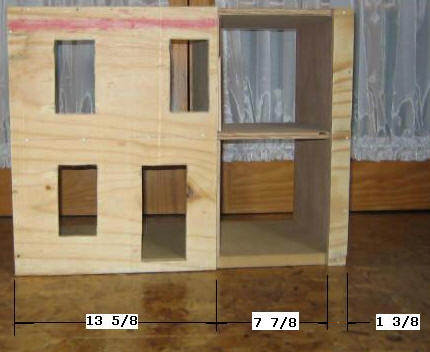
the tower fits between these two front panels.
4. Third Floor Room:

a. Cut the base (3/4" plywood) and floor/ceiling piece (1/2"
plywood) per the dimensions above (11 3/4" x 11 3/4").
b. Select the base piece (3/4" plywood); measure and cut the hole
for the stairway per the dimensions above (2 3/8 x 5"); it should
line up directly above the other holes previously cut.
c. Measure and cut the two side walls (11 3/4 x 10 3/4).
d. Measure and cut the two front panels; 10 3/4 x 1 3/8 and 10 3/4 x
3 1/4 per the diagram above.
e. Assemble the two sides to the 3/4" base with glue and 1" brads.
f. Position the floor/ceiling; glue and nail in place.
g. Install the front panels; glue and nail the 10 3/4 x 1 3/8
and the 10 3/4 x 3 1/4 panels per the diagram above; ensure
the tower fits between these two front panels.
Castle Wall Tops:
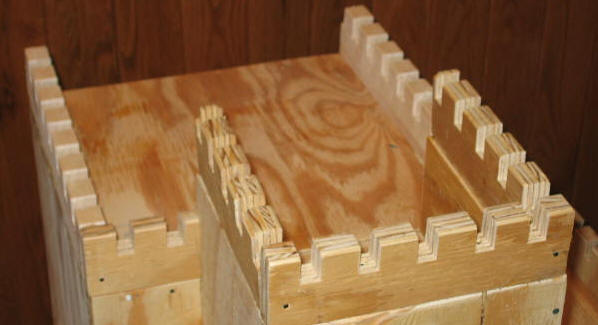
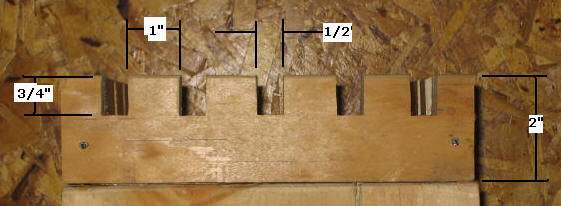
a. Select 3/4" plywood and rip it to 2".
b. Set up your table saw with a 1/2" dado blade; set it to a depth
of 3/4"; make dado cuts every 1" as shown above.
c. Measure and cross cut the wall top sections to length; apply with
glue and 2 1/2" finish nails.
Stairs:
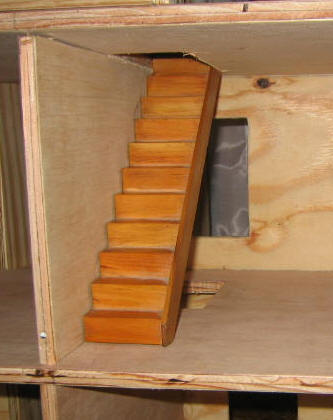


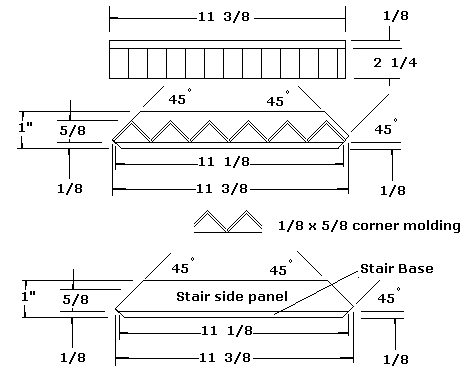
a. Cut the Stair base (1/8" plywood) and side panel (1/8" plywood)
per the dimensions above:
Base = 11 1/8" x 2 1/4" (with 45 degree angle applied).
Stair Side Panel = 1" x 11 3/8" point-to-point (with 45 degree angle
applied).
b. Measure and cut Stair Risers from the 1/8 x 5/8" "L"-shaped
corner molding to a length of 2 1/4"; 11 per
stair run.
c. Select and glue the Stair Base to the Stair side panel and let it
set overnight.
d. Select and glue the stair risers into place per the diagram
above.
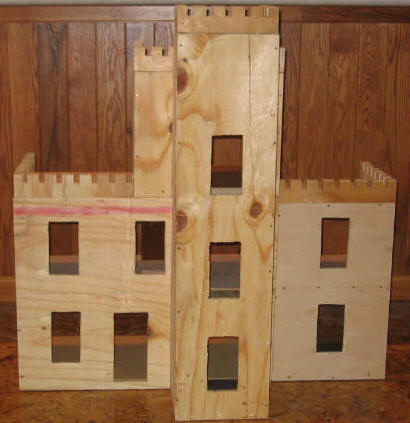
The basic structure is now complete; the work of customizing,
electrifying, and decorating it is to be planned and implemented;
this is where the real work begins. This simple, basic plan is
designed to be a castle-type structure; coating the exterior with a
rock-type covering, adding doors and windows; completing interior
floors, walls and ceilings to include lights/torches; purchasing and
building furniture and figurines. Months/years from now, you
could be the proud owner of a medieval town home/castle.
More FREE Plans!
Picnic Table Plans
Gun Rack Plans
Bookcase Plans
Bird Feeder
Boot Rack
Toy Box
|