|
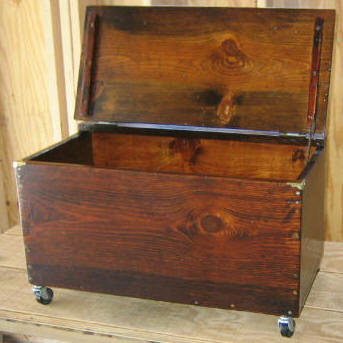
Building a wooden box to be used as
storage for firewood kindling is a
project that can be fun and practical. This
simple, butt-jointed wood box can hold a good amount of
paper or kindling for the fireplace or it can be customized
to
hold larger logs. You can build this
box
practically for free with the materials laying around your workshop;
I used some old barn boards that were milled to 3/4".

Material List:
If ole barn boards are not
available, use one piece of 3/4" hardwood plywood, 2' x 8', plus
matching edging material
Wood glue, plus 1" and 1 1/2" Woodscrews
Two hinges, one support hinge, brass
corners, and four wheels.
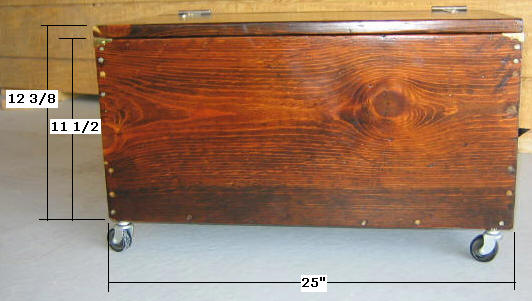
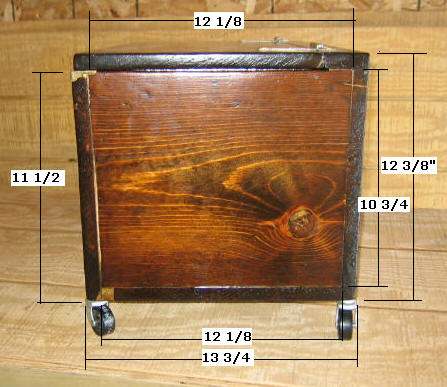
Step 1, Cut the Base Pieces -
Select plywood; cut the front and back panels @ 11 1/2 x 25.
Cut the bottom panel @ 12 1/8"
x 25" long.
Cut two side panels @ 12 1/8" x 10
3/4" high.
Step 2, Assemble the Base -
Select the bottom panel and lay it on a flat surface; Select
the front, back, and two side panels; dry fit all five
pieces.
1., With wood glue and 1 1/2"
woodscrews, attach the front and back to the side panels
(pre-drill and countersink the holes).
2. Attach all sides to the bottom
panel.
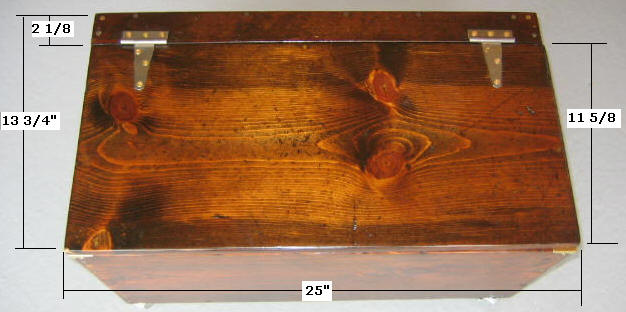
Step 3, Cut the Top - Select
the plywood; cut one top piece: 13 3/4 x 25"; Select the top
and rip a piece @ 2 1/8" that will become a stationary piece
for attaching the hinges. Attach the 2 1/8" support piece to
the back edge and the two side panels as pictured above.
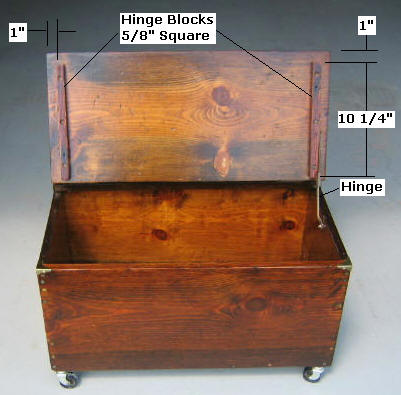
Step 4, Cut/Attach Hinge Blocks
- Select a piece of 5/8" square hardwood; cut two pieces to
10 1/4" each. Attach the blocks per the specs listed
above, one inch from each edge; use 1" screws.
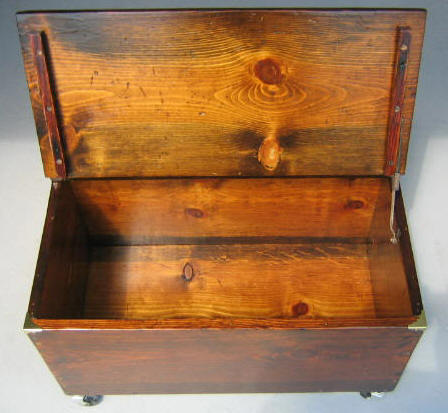
Step 5, Complete Box- Apply
edging material, fill all holes with filler, sand, and apply
stain and poly. Once the poly has cured, apply pads or
wheels, brass corners, two lid hinges, and one support
hinge.
If you would
be interested in other
chest plans, click
here!
More FREE Plans!
Picnic Table Plans
Gun Rack Plans
Bookcase Plans
Bird Feeder
Boot Rack
Dog House
Firewood Rack
|