|
Material List:
Five, Cedar or Plywood; 3/4" x 24" x
8': If using solid cedar, it will be necessary to
jointer all boards together with glue and biscuits to obtain
the 24" board width. If using plywood, it is possible
to purchase 1/4" cedar panels to overlay the plywood on the
interior of the armoire.
Two solid wood pieces; 3/4" x 4" x
10' for leg support braces and side braces.
One piece, 1/4" x 1" x 120" door
molding material for the door frames.
One piece, 1/4" x 3' x 6' cedar
plywood for the back panel.
1 1/2" brads/screws and wood glue.
Four hinges; two door pulls; two
door pressure clips or magnetic clips to keep the doors
closed; one 36" hanger rod with side brackets.
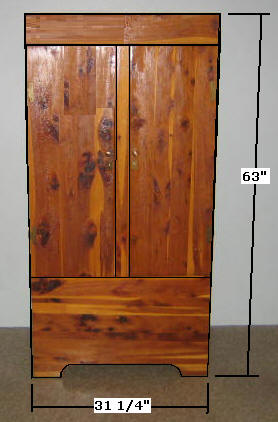
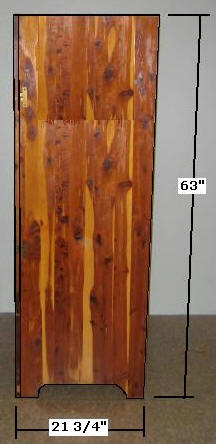
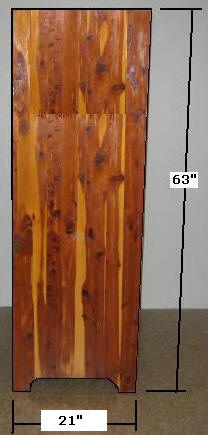
Step 1, Cut Side panels - Select
3/4" material; rip it two pieces @ 21"; crosscut them to x
63"; router the top edges: 3/8" wide, 3/4" deep, this
routing is done to receive the top panel.
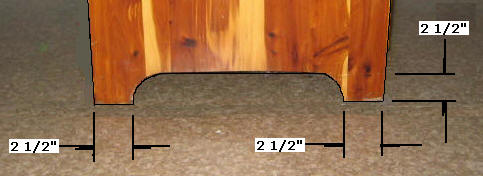
Cutout the bottom feet per the
dimensions above.
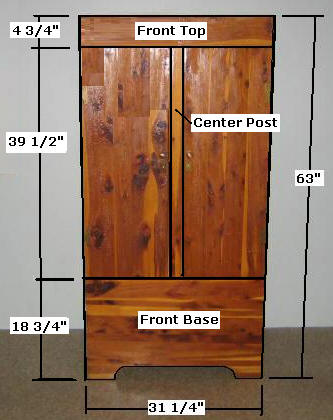
Step 2, Cut the front Panels -
Select 3/4" material; rip one piece @ 18 3/4";
crosscut it to 31 1/4" for the Front Base.
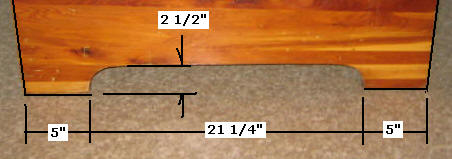
Cutout the bottom,
front feet of the Front Base per the dimensions above.
Select 3/4" material
for the Front Upper Rail; rip one piece @ 4 3/4"; crosscut
it to 31 1/4" as shown above.
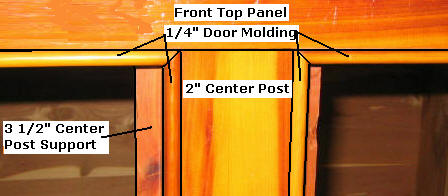
Select 3/4" material
for the Center Post; rip one piece @ 2"; crosscut it
to 39 1/2" as shown above.
Select 3/4" material
for the Center Post Support; rip one piece @ 3 1/2";
crosscut it to 46" as shown above; center, glue, and tack
the Center Post onto the Center Post Support.
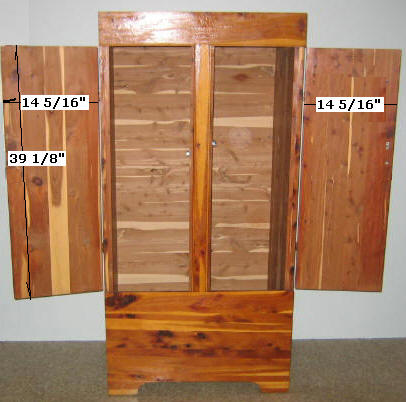
Select 3/4" material
for the two Doors; Cut two pieces @ 14 5/16" x 39 1/8"
as shown above.
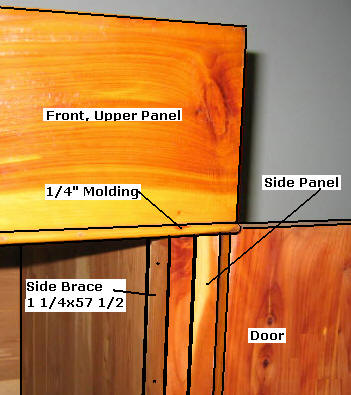
Select 3/4" hardwood
material for the two, Front Side Braces; Cut two
pieces @ 1 1/4" x 57 1/2"" as shown above.
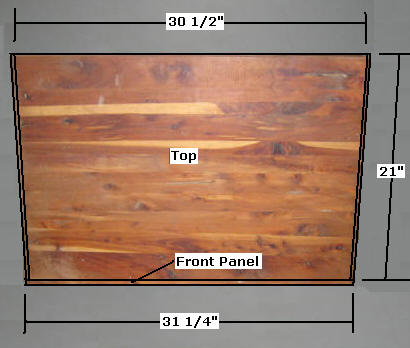
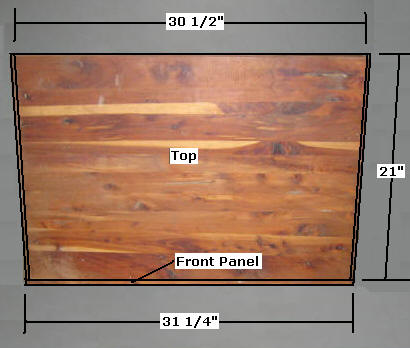
Step 3, Cut the Top Panel - Select the
3/4" material; cut a piece @ 30 1/2" x 21" for the top lid
as shown above.
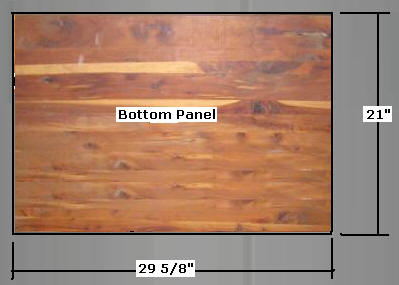
Step 4, Cut the Bottom Panel - Select the
3/4" material; cut a piece @ 29 5/8" x 21" for the Bottom
Panel, as shown above.
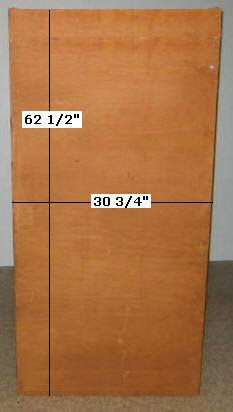
Step 5, Cut the Back Panel - Select the 1/4"
cedar plywood panel; cut a piece @ 30 3/4" x 62 1/2" for the
back panel.
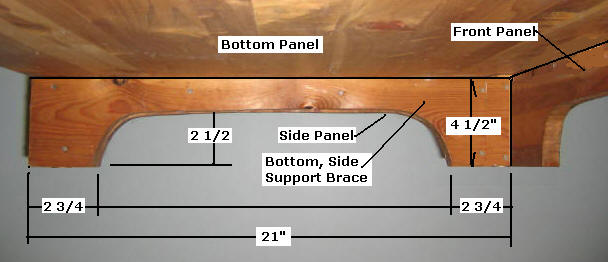
Step 6, Cut Bottom, Side Support
Braces - Select the 3/4" material; cut two pieces @ 4
1/2" x 21" for the Bottom, Side Support Braces as shown
above; these braces help support the Bottom Panel; glue
these braces to each of the side panels.
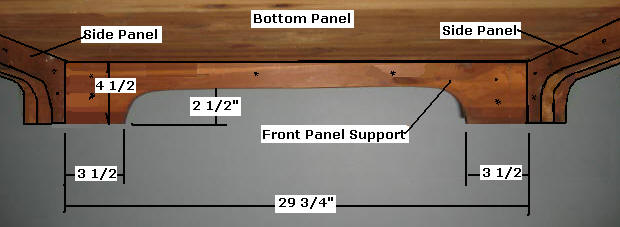
Step 7, Cut Bottom, Front and Back
Support Braces - Select the 3/4" material; cut two
pieces @ 4 1/2" x 29 3/4" for the Bottom, Front and Back
Support Braces as shown above, including the angle cuts;
these braces help support the Bottom Panel; glue one support
to the Front Panel.
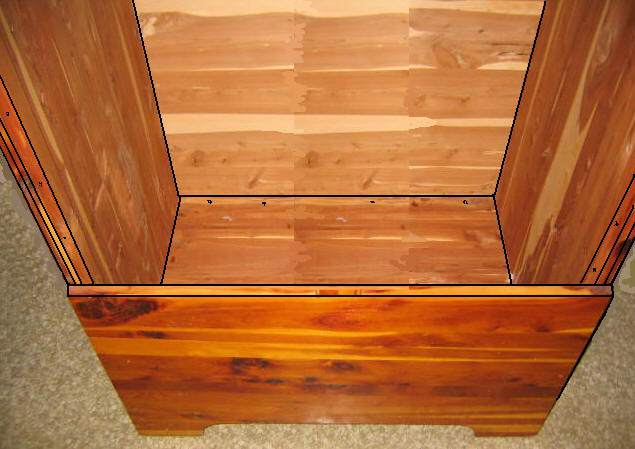
Step 8, Assemble the Armoire -
Select the two, Side Panels, the Front Panel; glue and tack
the three pieces.
Select the Bottom Panel and the
Bottom Support Brace; glue and tack these pieces.
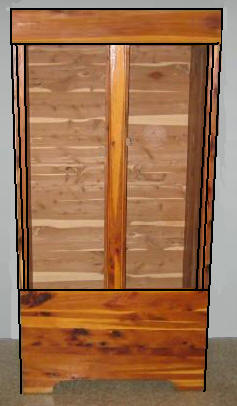
Select the two, Side Support Braces;
glue and tack these pieces.
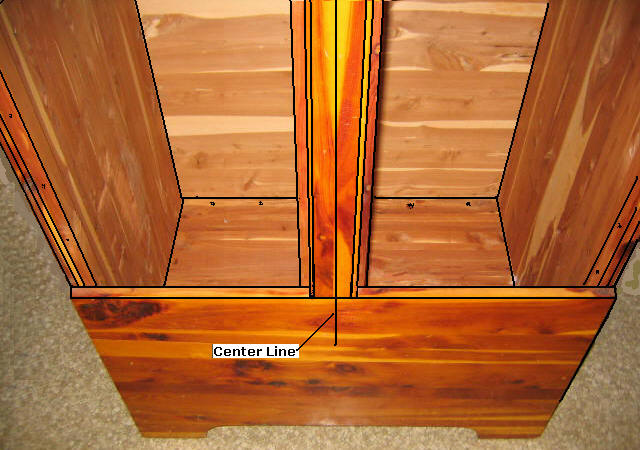
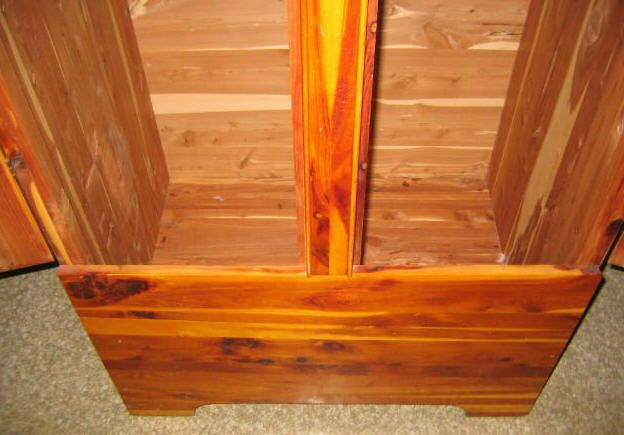
Select the Front, Post Component
piece; Clamp this Post component in the center of the
Front Bottom Panel
Select the front, Upper Panel; glue
and tack it in place. Center the Post component on the
Upper Panel, glue and tack the Post Component in place, top
and bottom.

Select the 1/4" Door Molding; cut
two pieces @ 39 1/2" (one end straight, the other a 45
degree angle). Cut two pieces @ 14 5/16" (one
end straight, the other a 45 degree angle). Glue and
tack all piece in place as shown above.
Select, glue and tack the Top Panel
into place.
Place the Armoire face down.
Select the Back Panel and center it into position along the
back edges; should be a 1/4" reveal on all sides; tack the
panel into place.
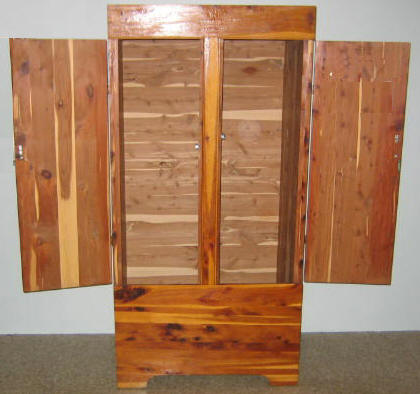
Select and install the Clothes
Hanging Rod.
Finish the Armoire by filling all
nail/screw holes, sand, and polyurethane the exterior
only (you may sand the interior cedar wood, but do not
put any type of finishing solution on the interior).
Select the Doors, Hinges, Knobs, and the door closing
mechanism; attach all parts.
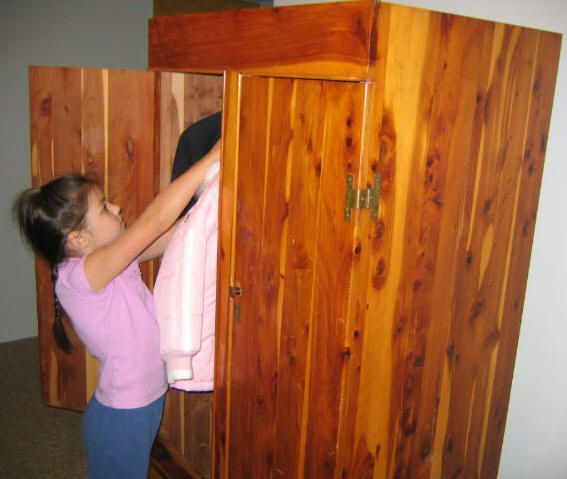
Your Armoire is now complete; you can now keep
your clothes in a moth-free, cedar environment; enjoy.
|