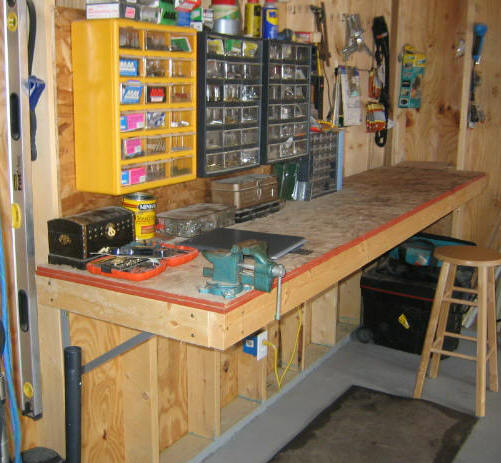
Building a workbench is a project that can be defined as the #1 project for a workshop.
This simple, sturdy workbench can be customized to build a larger bench. This rugged, simple workbench was built along
my garage wall to allow my vehicles to share the space; there are no legs touching the floor for easy cleanup; it provides the
perfect, solid work surface for a confined space.
Material List:
One piece of 1/2" Particle Board @ 4 x 10, for the top surface.
Five, 2 x 4 x 10' for the Support bracing.
Four, Metal Angled Brackets; 13" x 19"; these brackets supply the support:
Steel Bracket: 13" x 19 1/2" .
24, 5/16" x 3" Lag Bolts for the angled supports.
1/2 pound of each: #16 Spikes and 10 penny nails; 1 1/4" wood screws.

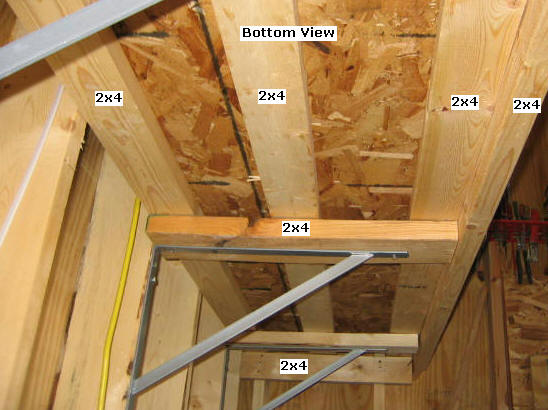
Step 1, Attach the Metal Brackets
to the Wall - Determine the height of the work surface;
measure down from the ceiling and add four inches (I
measured down 60"), make a mark, and snap a level line for
the length of the desired bench (This bench top, work
surface is 110 1/2"
long). Using the snapped line as a guide, space the
"heavy-duty" metal brackets every 32" on the studs and
attach them with the 5/16" lag bolts, as shown above.
Step 2, Cut and Attach the
Support Pieces -
Select one, 2 x 4 x 10', plus a 24" piece of scrap (can also
use a 2x4x12 or two pieces @ 2x4x6); cut six pieces @ 22 1/2" for the
support pieces. Lay one support piece flat, along the
top of each of the four metal brackets, the back edge of the
block touches the wall/stud; attach these support blocks to
the metal brackets with the wood screws from the bottom.
Step 3, Cut and Attach the
Secondary Base Support Pieces -
Select three, 2 x 4 x 10'; cut three pieces @ 109" for the
Base Support Pieces. Lay one along the wall edge; one along
the front edge, and one centered; attach all three with
nails to the short, perpendicular supports. Attach the
two, remaining short supports to the left and right ends.
Step 4, Cut and Assemble the Top
Surface and Front Piece - Select the remaining 2 x 4;
cut it to 110 1/2" and attach it to the front edge of the
Support Pieces as shown above. Select
the 1/2" x 4' x 10' Particle Board; crosscut it to 110 1/2"; rip
it in half, two pieces @ 24"; stack the two pieces on top of
each other and nail them to all the support pieces.

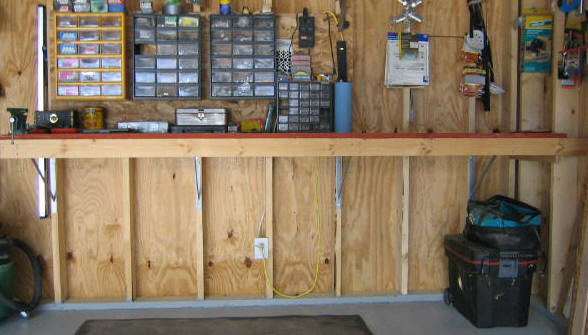
Step 5, Finish the Bench-
Attach a back panel above your bench; hang your accessories
and get to work on your new shop bench.
|